Saturday, May 14, 2016
Photoshop Phun
Friday, May 13, 2016
Making it Real (4): Finished

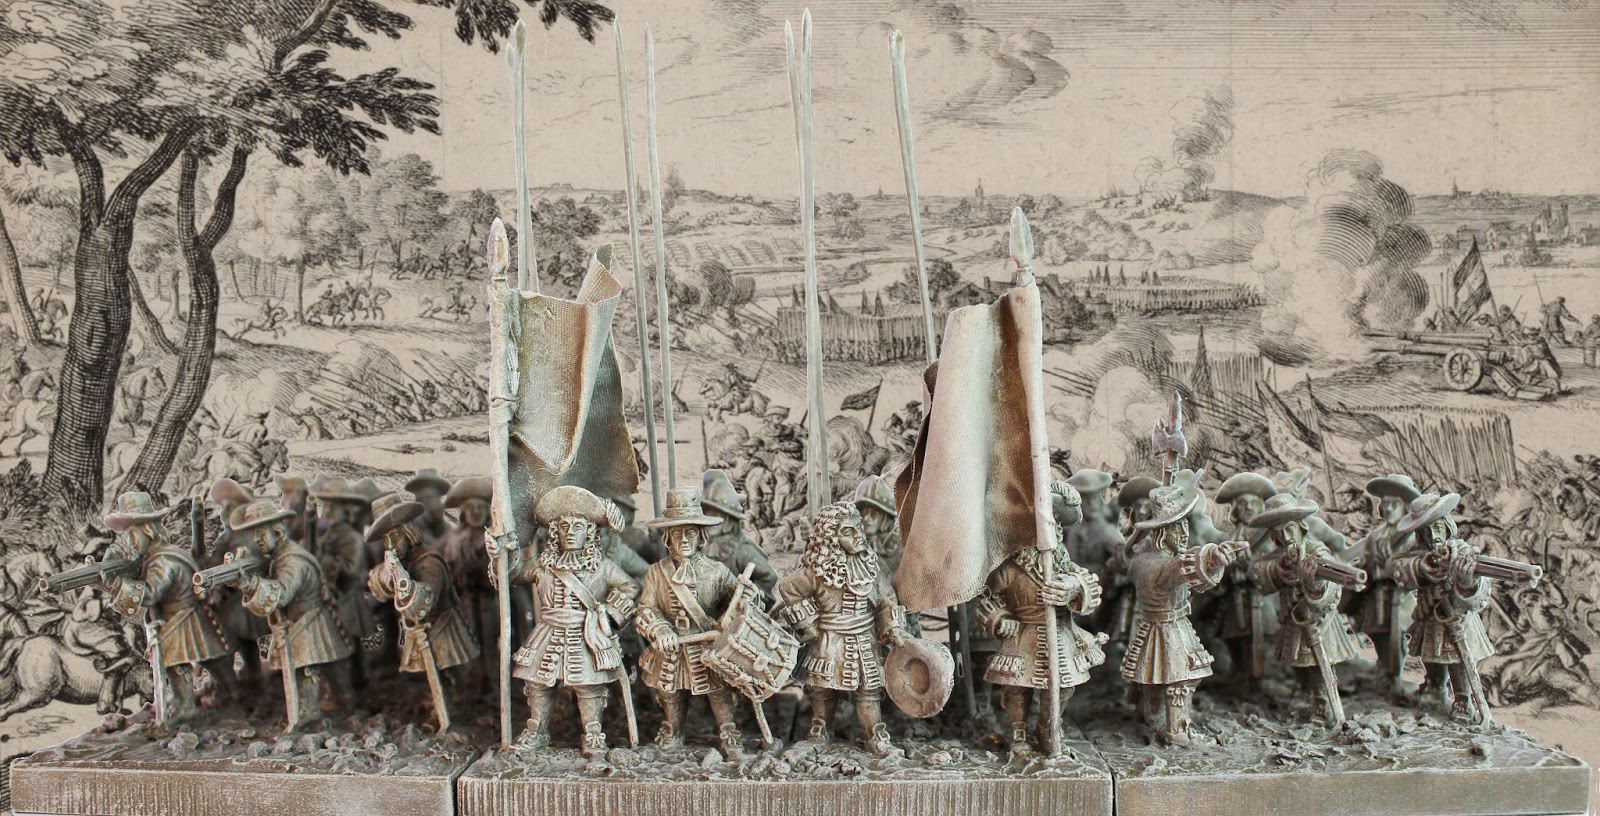
Well, the first battalion is done and I am satisfied with the results. I may return to lift the bases and ground work a little with further dry brushing but for the time being, this is it. I am tempted to Photoshop them onto a sketch backdrop. The light was poor at the time and given my general aversion to flash-lighting they appear darker than in real life.


Monday, May 2, 2016
Making It Real (3): Nearly There.


I thought this process would be much faster than it is but allowing 24 hours between painting applications, waiting for glue to set and putty to dry means it is taking be about a fortnight per unit. Still, it's been taking me a month to six weeks for fully painted units these days so I suppose it still is relatively rapid.
Saturday, April 23, 2016
Making it Real (2): Experiment Unfolds
Now that I've finally turned my attention to this project once more, I'm impatient to get it moving. Paint dries in it's own time; however, and my primers need 24 hours. Nevertheless, I have satisfied myself with my grey/brown undercoat and have hit the first test figures with the bone coloured dry brushing and am happy with the results thus far.
 The finish is darker than this exposed light photo might indicate and darkens as it dries. This has been fastidiously brushed on using a soft brush No:12 and unlike normal undercoating (especially when spraying) absolutely every nook and cranny must be filled as this base coat is the only one I should need for the recesses and deep detail. Otherwise I'd have to ink them which I think I can avoid. Funny, after so very many years of painting I still stumble across new tricks.
As total coverage is paramount for the base coat, I found holding my figures upside down when brush coating is best - it just hits all the recesses so much easier than the right way up!
 Okay, the next shot is my first highlight with the bone colour and you can see the comparison with the base coat alongside. I'll be almost dusting the figure afterwards with the merest of white dry brushing for highlights. I experimented with brushes and found that a No:12 trimmed to a flat end works best so far. I may also need a second undercoat over the Green Stuff hats.

As total coverage is paramount for the base coat, I found holding my figures upside down when brush coating is best - it just hits all the recesses so much easier than the right way up!

Friday, April 22, 2016
Making it Real (1): Prepping
It's been such a very long time since my last post and since I turned my attention to progressing my passion for wargaming the Williamite period. The essential issue is that this is simply one of many wargaming interests and it competes with my other cravings.
So, out came the box of my Williamite white metal collection and away I go. As you may recall, I determined to go with a parchment, colourless paint scheme to represent how a battle might look in the sketches of the period. The figures and terrain will all be in a sepia wash. Where uniform details are available I may introduce some coloured units into the mix in the future but for starters, it's a parchment effect for the first units.
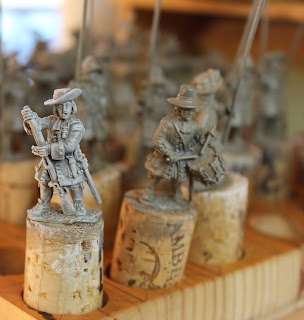
 In prepping the figures (all Front Range - late 17th Century range) I cut my own pikes and flag poles for the first 36 figure battalion of foot. They have 8 pike and 24 musketeers with a command stand of 4: 2 ensigns, a drummer and commander. I have cut my own replacement steel pikes which is a thicker wire than the rods supplied (see image) - I hammer the ends, cutting and shaping the blade points. I used the spontoon heads from the officer figures, drilling and gluing them on my own steel wire for the flag poles. Drilling a hole and fixing the butt with Araldite in the base and the open hand, I closed the hands over the shaft with needle-nose pliers for extra strength.
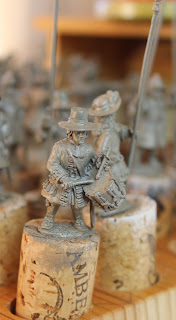
I decided to model a number of higher crown hats on my figures. Whilst the fashion by 1674 saw a widespread adoption of lower crown felt hats, there are still images depicting older, higher crown fashions amongst common soldiery - though not many. Whilst I love the tall 'pilgrim' crown hats of the previous generation, I have gone for a flat topped crown just double the height of the figures supplied. I deliberately made the drummer's hat close to a pilgrim.
I filed the figures crown flat, drilled and Superglue'd a pin made from the soft spontoon shafts from the officer figures. This proved important as I could slice through the extensions with a scalpel once the green stuff had set. I built the extension around the pin using Green Stuff epoxy putty, sculpting and filing the finished extensions once they had set sufficiently (overnight).
I'm ready to undercoat them now. I think at this time I'm going to undercoat them with a darker, grey-brown water based metal primer. I'm using house paints - a White-Knight tintable primer coloured to Taubman's 'Pickle Barrel' (7Db-2). I'm not used to acrylics and it has a satin finish so we'll see how we go. I can dilute it as I see fit. The undercoat will really be the base coat over which I'll heavily dry brush with an enamel tinted to 'Barefoot Beach' (Taubman's 9Da-3) for than bone/cream over grey brown. I'll finish with a light dry brushing of white just to hit the highlights before varnishing. One textured, the bases will be done in the same way as will the terrain and buildings - all in the same three toned finish. I still don't know if it will work so will experiment on one figure first. If it does, consistency of finish is crucial for everything on the table-top.
So, out came the box of my Williamite white metal collection and away I go. As you may recall, I determined to go with a parchment, colourless paint scheme to represent how a battle might look in the sketches of the period. The figures and terrain will all be in a sepia wash. Where uniform details are available I may introduce some coloured units into the mix in the future but for starters, it's a parchment effect for the first units.

 |
| Supplied shafts in front for reference |
 |
| High hats before cutting and filing them down. |
 |
| Cut down hats |
I'm ready to undercoat them now. I think at this time I'm going to undercoat them with a darker, grey-brown water based metal primer. I'm using house paints - a White-Knight tintable primer coloured to Taubman's 'Pickle Barrel' (7Db-2). I'm not used to acrylics and it has a satin finish so we'll see how we go. I can dilute it as I see fit. The undercoat will really be the base coat over which I'll heavily dry brush with an enamel tinted to 'Barefoot Beach' (Taubman's 9Da-3) for than bone/cream over grey brown. I'll finish with a light dry brushing of white just to hit the highlights before varnishing. One textured, the bases will be done in the same way as will the terrain and buildings - all in the same three toned finish. I still don't know if it will work so will experiment on one figure first. If it does, consistency of finish is crucial for everything on the table-top.
Subscribe to:
Posts (Atom)